I try to find crafts that are interchangeable with the seasons. There are so many holidays that have "WORD" associated to them. It got me thinking of how I can use these "WORDS" to decorate.
I bought 4 different sized frames at the dollar store. I then went though my scrapbook paper to find paper pieces that went with each holiday. I then started to think of 3 or 4 letter words that would go with each season or holiday. This is want I came up with....
SNOW, LOVE, LUCK, RAIN, SUN, STAR, FALL, BOO, NOEL.
You could really have fun with this, & you could also add a frame for 5 letter words if you wanted. I cut the words out of vinyl with my Silhouette.
I did end up buying a few pieces of paper to go with a certain season or holiday, but over all I didn't spent much.
See Christmas to take a look at NOEL!
Thursday, March 8, 2012
Wednesday, March 7, 2012
Valentines Craft #2
I got my husband to cut some wood blocks, painted them, Mod Podged on cute paper. I then cut vinyl letters out on my Silhouette , adhered them to the blocks and TA DA!!! DONE!
P.S. I made them doubled sided, the back has SPRING on it.
Labels:
crafts,
decor,
Valentines
Monday, February 13, 2012
Valentines Craft #1
I don't have a lot of Valentines crafts, so I decided it was time to make some. I think that my 1st craft is my favorite. It was very easy & very cheap make. I got the strofoam balls at the Dollor Tree, & the candy at my local grocery store. I hotglued the candy onto the strofoam balls, and that is it! DONE!!
Labels:
crafts,
Valentines
Saturday, December 24, 2011
Christmas Crafts
I made a few new crafts to add to my Christmas decorations. I made this with picture frames from the dollar store. I then found some scrapbook paper that I liked, cut it to fit the frames & Cut the letters out on my Silhouette. Cheap, Quick, Simple & cute!
Next was my JOY blocks! My husband cut out the blocks for me. I painted the blocks white, when dried, I sanded the corners. I then found some scrapbook paper that I liked, cut it just a bit larger than I wanted and then torn and inked the edges. I then mod poged the paper to the wood blocks. I cut the letters with my Silhouette. Adhered the letters, and added the embellishments (ribbon and buttons as holly). This was simple. I already had everything at home, so it really cost me nothing but time. I made a few of these to give away as gifts, because I was so please with how they turned out!
Tuesday, August 30, 2011
Something for the HOME!
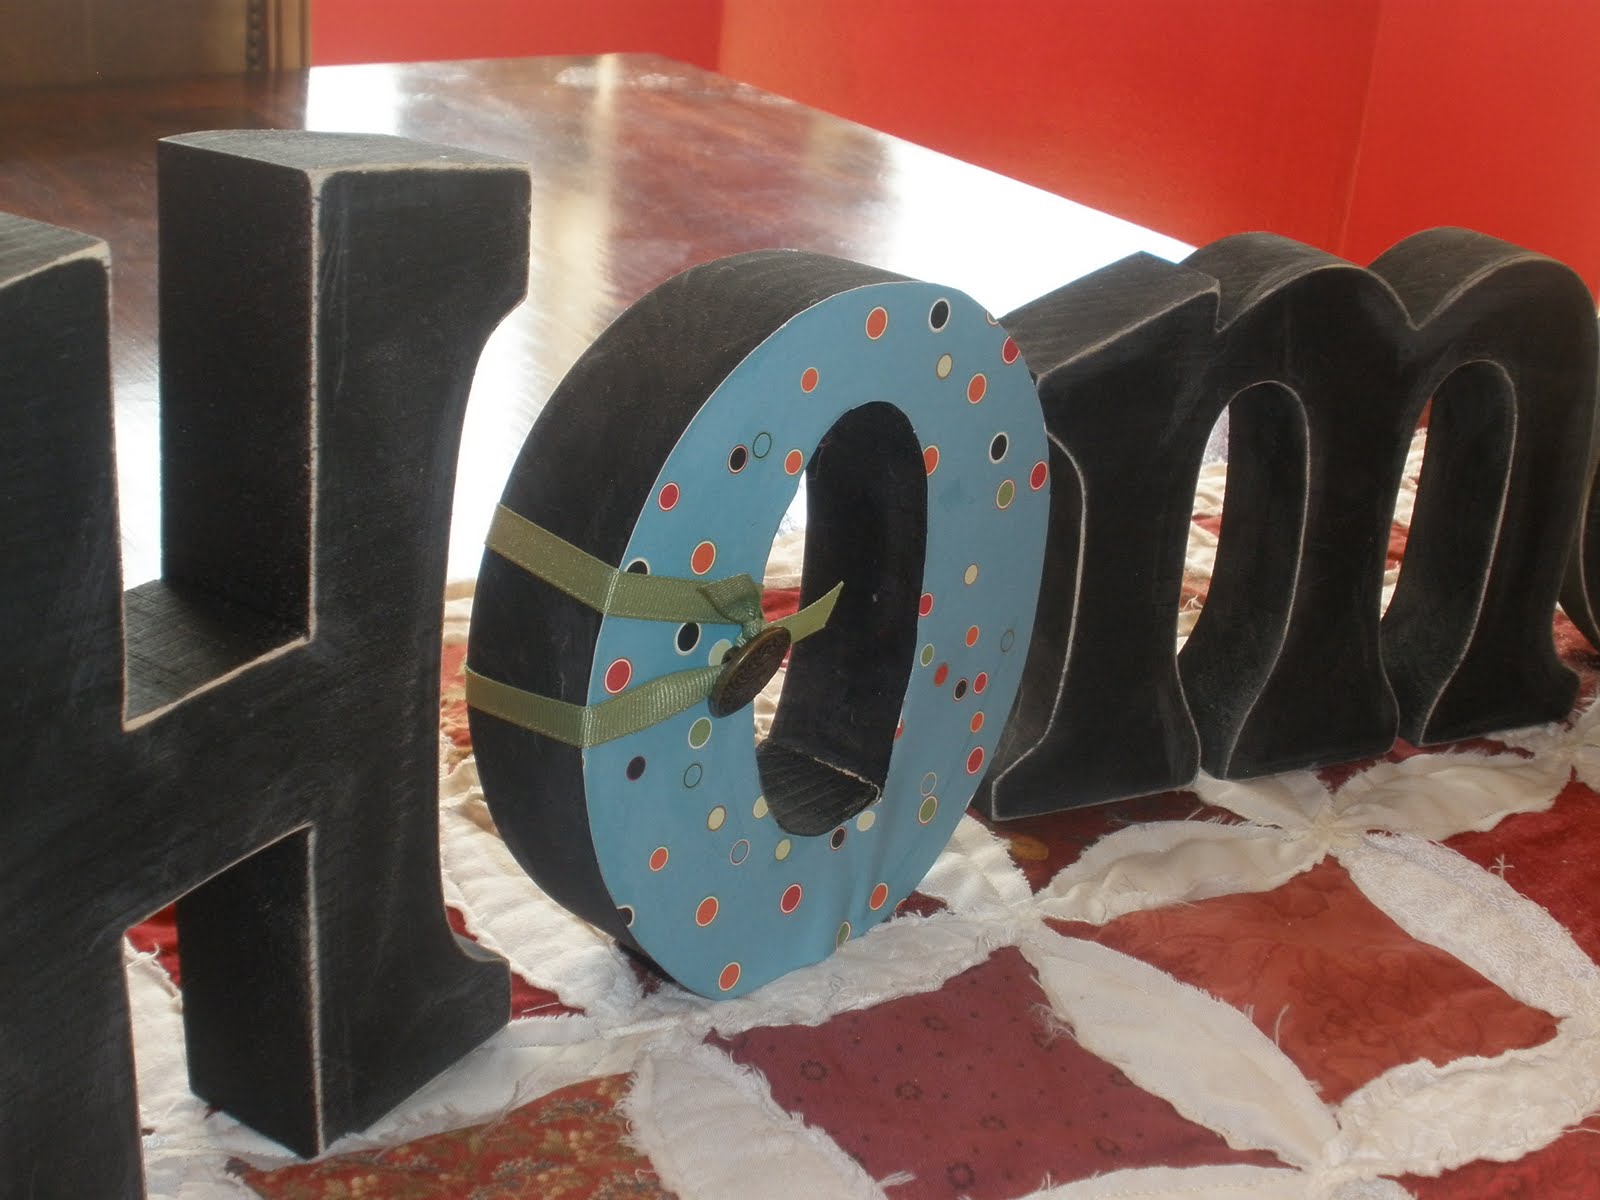
I have been wanted to make a "HOME" for house! I wish I had a saw that I could cut everything that I want, but alas I don't. I found these letter at Roberts for $13.99! I really liked how chunky they were, so I bought them! A very easy project. I painted them BLACK with the help of my 4 year old. I Mod Podged paper to the "O" & added some ribbon and a button for an embellishment, and finally I sanded the edges. I am very please with how it turned out!
Tuesday, August 9, 2011
Lima Bean Wreath
I had a friend tell me about Lima bean wreaths and how she saw them on a blog. I made several of them, but could never find the blog that she was referring to, but I have found it, and can now give credit where it is do. ! Thanks southernlovely !!
Here is what you need....
foam wreath
Lima beans
Hot Glue
Spray Paint
Glue beans to wreath however you like. Spray paint! TA-DA SUPER CUTE and SUPER EASY to make. I found foam wreaths at the dollar store (I bought 10) and had everything else at home. I made 2 of them in white for C's room! I also made one in red which was by far my favorite!
Here is what you need....
foam wreath
Lima beans
Hot Glue
Spray Paint
Glue beans to wreath however you like. Spray paint! TA-DA SUPER CUTE and SUPER EASY to make. I found foam wreaths at the dollar store (I bought 10) and had everything else at home. I made 2 of them in white for C's room! I also made one in red which was by far my favorite!
Saturday, July 16, 2011
Cupcake Birthday Cards
I LOVE making cards. It is very therapeutic for me. I have been making birthday cards lately because that is what I use the most. I have been on a cupcake theme lately. This is what I have come up with.
Labels:
crafts,
homemade cards
Tractors!
K my 4 year old LOVES tractors! Any color or kind. This is always fun, because we live in a farming community and there are tractors going up and down our street everyday. I was in ALCO (a VERY small version of Walmart that is near us or as my husband would say, you can buy everything from lingerie to fishing tackle) Surprisingly, they have pretty cute home decor & crafts. I was checking it out and came across some old tractor prints. They were marked $49.99. I would never pay that much for them, but I would pay $9.99, YES $9.99 a piece!! I bought 2 of them for K's room. I also bought a tractor calendar that was from last year that was only a dollar. I came home, hung the prints in his bedroom, and cut out the tractor calendar and hung them up as well. I really haven't done much else in his room, we did paint in blue and green, I let him pick the colors, but that it about it. I would like to do more, but he told me to leave it alone, for now at least!
Monday, July 11, 2011
Homemade Play Dough
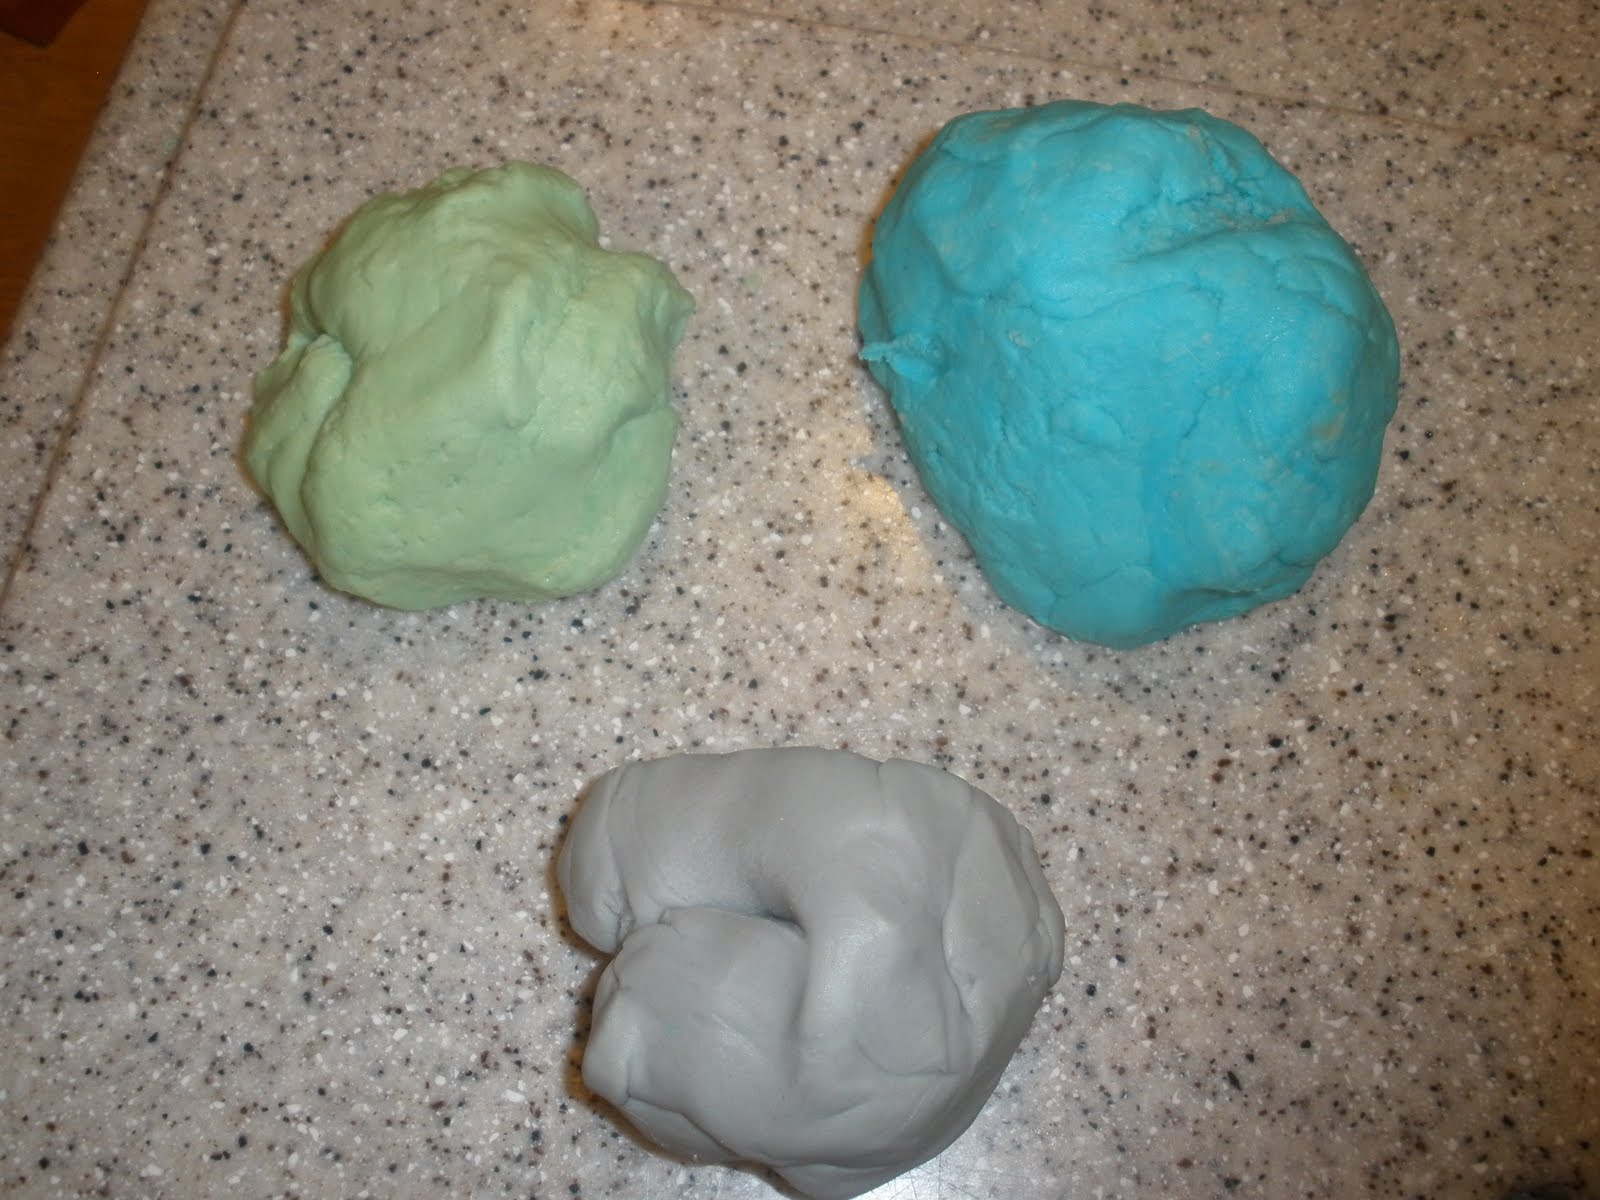
I am always looking for fun things to make with my kids. I have a cook book that was made by the town I live in, I found a recipe in it for play dough. It is very easy.
2 1/2 C flour 3 T. oil
1/2 C. salt 2 C. boiling water
1 T. alum
Begin boiling water
Stir flour, salt and alum together in a large bowl. Add oil and cut oil into flour. Add water. Mix with a large spoon until cool enough to knead with hands.
***If you want to make the play dough colored add coloring to water BEFORE you add water to flour mixture. I have split the flour mixture into two bowls and added 1 C. of different colored water to each bowl.
I store the play dough in a ziploc bag. It will stay good for months, if you keep the bag closed. The older it gets, it will start to get hard salty spots in it. I just pull those out and trash them.
I love this play dough because I KNOW what is in it, and it is super cheap to make.
2 1/2 C flour 3 T. oil
1/2 C. salt 2 C. boiling water
1 T. alum
Begin boiling water
Stir flour, salt and alum together in a large bowl. Add oil and cut oil into flour. Add water. Mix with a large spoon until cool enough to knead with hands.
***If you want to make the play dough colored add coloring to water BEFORE you add water to flour mixture. I have split the flour mixture into two bowls and added 1 C. of different colored water to each bowl.
I store the play dough in a ziploc bag. It will stay good for months, if you keep the bag closed. The older it gets, it will start to get hard salty spots in it. I just pull those out and trash them.
I love this play dough because I KNOW what is in it, and it is super cheap to make.
Labels:
crafts,
kids stuff,
recipes
Saturday, July 2, 2011
Fireworks!
Super simple made them in about an hour!! I found some scraps, or rather stole some piece of wood from my husband who was making shelves in the shed.
Painted them RED, WHITE & BLUE.
Sanded the edges
Found some cute scrabook paper, bent up corners
Mod podge it to the wood
Wrapped twine around
Cut USA letters out with me Silhoutte
Glued to paper
Stapled peice of yellow rope to top
TA-DA!!
USA Fireworks for the 4th of July!
Labels:
4th of july,
crafts
Wainscoting Flag!
I have to give my friend Jill some credit for this. I saw something similar in her house, but I tweaked it a bit. I found a large piece of wainscoting in our garage. I cut in down to a size that I like (mine is about 17in x 22in). Using painters tap, I taped of the white rows first. Painted them and let them dry a for a while. I then taped off the red, and painted them. Finally I taped off the blue. After everything was dry, I went back and touched up some places. I was planning on just using paper stars, until I came across these wooden stars I had laying around. I painted them yellow. After painting eveything , I destressed it with sand paper, hot glued the stars on , & hot glued a peice of twine to the back to hang it with. I have it hanging on my front door, but I also have one in my kitchen that I just have sitting on a shelf.
Labels:
4th of july,
crafts
Thursday, June 16, 2011
Fathers Day for Kids
My four year old boy asked me today what he could get daddy for fathers day. I asked him if her wanted to make something and of course he did. I foraged around to try and come up with something that he would enjoy making that wasn't too hard. I found a couple of scrap pieces of 2x4. I had him pick out some paint colors, of course he pick green and orange (his favorite). I had him paint the blocks. While the paint was drying (forever if you ask him) he gathered a few things to decorate the blocks with. We found some pictures, sticks, buttons, and jewels that he liked. We Mod Podge the pictures to the blocks. He then glued on all of the stuff that he found to decorate with. I ended up having to Hot glue the sticks on because they wouldn't stick with craft glue.

Labels:
crafts,
fathers day,
kids stuff
Summer Letters
I was trying to find something to make a cute "summer" craft. I happened to come upon letters that were on sale at JoAnns, so I snatched them up.
I wanted it to be bright! I came home went thought ALL of my scrapbook paper. I traced around each letter, cut them out & adhered them to the letters with Mod Podge.
Labels:
crafts
Subscribe to:
Posts (Atom)